


 Comment (13)
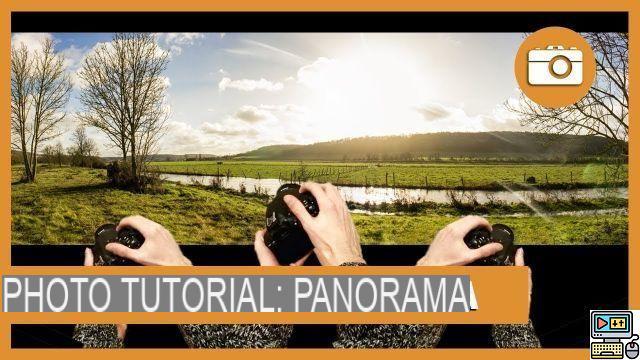
Perched at the top of the ski slopes, it's a safe bet that you will be tempted to transcribe the immensity of the landscape that is offered to you in the form of a panoramic view. Indeed, beyond the angle of view embraced by your photo, the elongated framing of this type of image contributes to the impression of expanse on your subject. Let's see together several methods for successful panoramic shots.
What is a panoramic photo?
There is not really a strict definition of what a panoramic photo is and as with other notions in photography, everyone will have their own appreciation. Nevertheless, it is considered that to be qualified as panoramic, a photo must present an elongated format in which the longest side is at least twice as large as the shortest (that is to say greater than a 2:1 ratio). This photo can be vertical or horizontal, although the second case is more frequent. Some people also consider that to be qualified as panoramic, a photo must obligatorily embrace a wide field, equivalent to that of a 20 mm in 24x36 for example. From this observation, taking a panoramic photo can simply consist of cropping a photo taken at wide-angle, as in the example below.
Take a panoramic photo by cropping: original wide-angle photo.
Take a panoramic photo by cropping: result once the photo is cropped.
There remains the question of the aspect ratio to adopt: if it must be at least 2:1, there is no upper limit. It is up to everyone to decide what seems most appropriate to them. In the example above, we chose a 3:1 ratio which, in our opinion, brought more dynamics while preserving acceptable dimensions for a comfortable display on the screen. The type of use must actually be taken into consideration at this stage so that the photo remains sufficiently descriptive. By adopting a ratio of the order of 5:1 or 6:1, we would have had to zoom in strongly on the image or print it in a very long length to begin to have an acceptable height.
It is difficult to see this very long panorama correctly on a website like ours. For this kind of images, it is better to have a tool allowing to navigate in the photo.
With the cropping method there is also the problem of the final definition of the images and the maximum angle covered. Using the panoramic mode of the devices is then an interesting option.
Panoramic camera modes
To maintain good image quality despite the very elongated image ratio, it was possible in the days of film photography to use cameras dedicated to panoramic shots. We are thinking, for example, of the Hasselblad X-Pan and its 24 x 65 mm views (i.e. a ratio of 27:10), the Fujica G617 and Linhof Technorama medium format cameras, or even the panoramic adapter for loading 135 film in a Mamiya 7. In digital, to extend the field covered in shooting, we use the assembly of several images produced by scanning the scene. For many years, panoramic modes have performed this combination directly in the camera, so that you automatically recover a file in elongated format with better definition than that obtained after cropping.
On the Panasonic GX80, Panoramic mode is accessible directly on the wheel. Other brands sometimes place this function in the Scenes modes.
The beginnings were chaotic and the first models with a framing assistant from Canon or Olympus were of relative efficiency. Today, the system works much better and equips some SLRs as well as hybrids, compacts and smartphones. Note, however, that not all brands are equal in this area. Canon almost never offers a panoramic mode on its cameras, whereas the Sony or Fujifilm systems are among the most advanced since it is possible to carry out panoramics by horizontal or vertical sweeping.
On the Fujifilm X-H1, announced last week and which we have just tried, we had the choice between two panorama formats: the first measuring 6 x 400 px in its original format (top), and the second offering a wider angle and resized in 2 x 160 px (bottom).
If the Panasonic system is a little noisy (it lets hear the click of the shutter with each shot, where other brands use a silent shutter), it has the advantage of allowing the interruption of scanning at desired moment for more or less wide angles. With most other cameras, the sweep angle is fixed and panning is not saved if you don't complete the process. Note also that some products perform 180 or 360° scans. These extremely elongated formats will only be usable by display giving the possibility of moving around in the image.
This 360° panorama is difficult to read on a fixed display on the site.
As efficient as they are, these automatic functions of the devices nevertheless have some flaws. First of all, you have to be able to perfectly maintain the horizon during the scan to make the most of the definition offered by the device; the system also causes the appearance of ghost images on moving subjects; it is generally not possible to choose the scanning speed or the definition of the images; finally, the file generated by the device is only available in JPEG. For these reasons, the method offering the best final quality consists in photographing a scene by carrying out a manual scanning to carry out the assembly of the images a posteriori in a dedicated software.
Panorama stitching on software
Realization of shots for a panoramic assembly.
Before tackling stitching software solutions, take care of your shot. To obtain high definition during your final editing and take advantage of a wide field, hold your device vertically: the height of your panorama will thus be able to reach the definition of the largest side of your sensor. Take successive shots by scanning the scene, making sure to keep large areas of overlap between each image: it is these identical areas on two consecutive images that the software uses to stitch your photos. To achieve a perfect panoramic montage, it is necessary to rotate around the entrance pupil of your photographic system; the use of a panoramic head is then essential. However, if you don't include a foreground in your image and you have fairly large overlapping areas, current software will do just fine with hand-shots that are a bit more random.
If your scene includes moving subjects, watch out for ghosting during stitching
Be careful to use the same exposure values for all your photos to avoid areas of different densities on the final edit. To do this, take a measurement at different points of the field that you want to photograph. Either your cell indicates the same exposure, in which case you can let your camera automatically set the parameters for aperture, speed and sensitivity, or the scene has significant differences and you will need to set an average or valid exposure for the majority of the scanned field. Finally, shoot in Raw to more easily adjust these settings in post-production while maintaining good image quality. Once your photos are saved, you can stitch them together on your computer.
Softwares
There are many panoramic editing software, more or less sophisticated and more or less expensive. We won't list them here, but we will nevertheless mention some of the most complete and professional: Autopano from the publisher Kolor / GoPro, available in Pro 4 versions at €99, Giga 4 at €199 and encore Video 3 at €599.
Among the free solutions, Hugin 2017 offers very satisfactory results, but you will have to demosaicate your photos before stitching them, because the software does not manage Raw.
The free Hugin 2017 software allows you to make panoramic assemblies.
Hugin 2017 offers different projection options.
Result of assembly with Hugin. The software offers to save the final images in JPEG or Tiff.
Finally, if you use Lightroom Classic (or its earlier versions) or Photoshop, you will also be able to take advantage of their panorama stitching functions. We prefer to do this step in Lightroom, not only because the software is used to catalog our photos and it is pleasant to keep it throughout our workflow, but also because it allows us to make panoramic assemblies. directly from Raw files. The result is saved in DNG and therefore retains a wide range of corrections that can be made before exporting to JPEG, for example.
To call this function, simply select the photos to be stitched and call the Photo Merge > Panorama function. The software offers three types of projections: spherical, cylindrical or perspective. The first is more suitable for very large panoramas and aligns the images as if they were projected in a sphere. The second realizes a projection on a cylindrical surface and preserves the vertical lines as much as possible. The latter also keeps the straight lines, but stretches the edge images more significantly. It is not suitable for very wide panoramas or for photos of close subjects. To find out which projection best suits your images, just try the different options and observe the preview generated.
Once satisfied, you just have to choose whether you want to crop the image automatically, then do it freely in the software, or decide to apply a warp on the edges to fill in the blank areas of the panoramic montage. After clicking Merge, the edit is calculated and the image added to the library. All that remains is to apply tone or color corrections before possibly exporting or sharing on social networks.
Here, we've chosen to keep the spherical projection that we've cropped in a panoramic ratio and applied corrections to using Lightroom's Global and Local Retouch tools.
By proceeding in this way by assembly in software, it is possible to obtain panoramic images of very high definition, with fine details and high image quality.
to read also:


