


 A nice feature of Mac computers is that it allows you to open preview images, without opening them in a program but simply by enlarging the photo with a zoom, directly from the desktop. This same zoom effect is available on some websites where, by clicking on a photo, the page darkens while remaining in the background and, with a fade effect, you can see the large image.
On Windows, when you click on an image file, it is displayed with the default program which, by default, is the Windows image viewer. Personally, I think the default image viewer in Windows is bad and that the best program to browse and see photos on your pc is IrfanView with which you can view images by going back and forth with the space bar. However, as written in other articles, if you need a program not only to view images and photos but also to manage collections and albums, the choice the better the powerful software, in In your language, Google Picasa.
UPDATE: Picasa is no longer being developed by Google who abandoned it in 2016. Its latest version, released late 2015, however, you can still use it on your PC and download from site Softpedia
On Picasa it is also possible to enable the zoom effect with the thumbnails of enlarged images, from desktop, without leaving the folder. To enable image previews in Windows you must then free download Picasa and install it on your computer. During the installation you can deselect the various settings on the search engine and on the sending of anonymous information.
When you start Picasa Photo Viewer for the first time, you are prompted to scan images to your computer which must be done.
The next step instead requires you to choose whether to use Picasa viewer as the default program to open different image files on your computer including JPG, BMP, GIF, PNG and RAW formats. Just by enabling Picasa as the default photo viewer, you activate the image preview function directly from the Explorer.
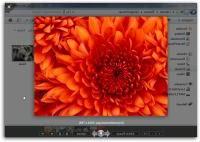
I can assure you that Picasa is a great photo album manager, if not the best ever, with multiple image editing options and even facial recognition. However, if you close the program, you will notice that, from now on, if you click on an image on your Windows PC, it opens as an enlarged preview. The screen goes dark, everything you see on the desktop goes into the background, and the photo will appear large, in a full-screen, panoramic interface. The preview opens almost instantly and, at the bottom, the thumbnails of the other images that are in the same folder appear. Also at the bottom there are buttons that allow you to zoom the photo, enlarge it, turn it, modify it or publish it on the internet in Picasaweb. The Play button allows you to view the photos as a full-screen slideshow.
With the left and right arrows on the keyboard you can browse the images while with up and down or with the mouse wheel, you can zoom in and zoom out. You can press the Esc key on your keyboard or click the X in the upper right corner to close the preview. If you press on the darkened and gray area, the preview becomes a normal window and no longer full screen.
You can easily change the Photo Viewer settings from the Picasa program's Tools menu by clicking the "Configure Photo Viewer" item. Among the settings you can choose which file types to use this preview mode for and there are some options for the user interface.
If you don't like the viewer or, in any case, you prefer to use another program like IrfanView that I use, just choose, in the configuration menu of the photo viewer, not to use Picasa Photo Viewer. The photos and images from your computer will reopen with the default program that was used before. Honestly, even if I don't use Picasa that often, I think it is an absolutely phenomenal program, both for managing photos and because it has many easy and powerful functions and allows you to browse photos with a general glance and with previews from the desktop.
Best Picasa Features
1) The Movie Maker
With Picasa you can create a video with photos that slide one after the other and background music. You can then add animated transition effects between one photo and another, you can write an overlay text as captions or subtitles, change the color of the text and background and then upload the video to Youtube directly from Picasa.
2) Collage
With Picasa you can create an index page of all your favorite photos like a collage on a wall or panel. The fill color is customizable and enhances the look of the collage. Picasa allows you to use different layouts to arrange your photos on the page and a good range of formats for collages so you don't have to manually resize the images to fit the screen and make the page larger.
3) Remove low quality images
Picasa's continuous indexing feature is sometimes a valuable and sometimes annoying feature. In fact Picasa indexes all the folders with images inside the computer and to remove them you have to act manually. Be that as it may, it is possible to remove low-quality images from the collection so that only the photos taken with your own camera remain in Picasa. This option is seen when printing an image by pressing the Verify button at the bottom right.
4) Timeline view
In Picasa, photos can be collected in various locations depending on the folder in which they are stored. However, all photos can be sorted by the date they were copied to your computer or by size and other attributes. The Timeline feature is a really nice viewing mode to look at, with graphics 3D and photos that are arranged along a timeline. The Timeline is activated from the View menu.
5) Group the faces
Picasa integrates a search filter has really changed the way find people from images saved on your computer. The face-matching technology implemented in Picasa search makes it extremely easy to find people by their name. Basically, after the first scan of photos, Picasa automatically recognizes all those with human faces and faces. By clicking on People from the left menu, you will see the various faces to which you just need to assign a name. After writing a person's name, they will automatically be recognized in all other photos. The facial tagging process in Picasa is as innovative as it is simple, fast and intuitive. At the end you will be able to browse the photos according to the people, friends or relatives they are.
6) Color Based Filter
Aside from the face recognition filter, Picasa has the ability to search photos based on predominant colors. For example, you can view all the black and white images in the collection or apply other conditions. The color filters are in Tools -> Other Functions -> Search.
7) Associate music with each album
The best way to enjoy an image slideshow (as in step 1) is to set a suitable background music. The music is chosen in Tools -> Options -> Slideshow and the songs contained in the chosen folder are played, at random. To associate a particular music to a specific album just click on an album in the navigation bar, select Edit folder description and choose a song from the computer where it is written use music for slideshow.
8) Edit many photos together
The first thing to do whenever you import photos from your digital camera to your computer is to adjust the orientation of the images by rotating them horizontally or vertically and vice versa. Instead of rotating them one by one, you can do the editing of an entire group of photos in one click from the Image -> Batch Edit menu. As you will see, in the editing options of groups of photos there are rotation, renaming and even a great red eye corrector, to improve the sharpness of the images, adjust the color and contrast of the images. All and operations are automatic and of a very high quality level.
9) Face Movie
I had already talked about this in another article describing the Face movie as a transition effect with zoom on the faces in the slide show of images. The best part is that you don't need to manually mark the person's face area because Picasa using the People filter automatically detects faces in selected photos, allowing you to create a Face Movie movie with just one click.
10 ) Create A Gift CD
If you want to give a photo CD to a friend, a girlfriend or a relative you can use the Picasa gift CD function. From the Create menu, you can choose Gift CD and find a graphical interface where you just need to choose the photos to copy to the CD. The disc will also include Slideshow for better viewing of photos. With the Burn button, the photos are copied onto the CD.
11 ) Associate photos with places in Google Maps
With the direct integration of Google Map, Picasa gives the possibility to users who have a Google account to annotate the favorite places visited with the images saved on the computer.
Go to the menu View -> Places and wait for the geographic map to appear. Once the area where to locate the photo is highlighted, just use the mouse to drag it to a point on the map and geotag it.
12) Among other things that can be done, there is the creation of screensavers with photos
Picasa: best viewer and manager of images and photos on Windows


