


Predefined tools to turn PDF to JPG on Mac
First, let's try to understand how to turn PDF to JPG on Mac using those who are the predefined tools included in macOS: Preview e Automator. To find out more, read on.
Preview
If the PDF document you need to turn into a photo consists of a few pages, I recommend using Preview, the macOS application with which images and PDF files are opened by default. It allows you to export PDFs to JPG but unfortunately it does not process more than one page at a time, so it cannot be used with particularly “full-bodied” documents.
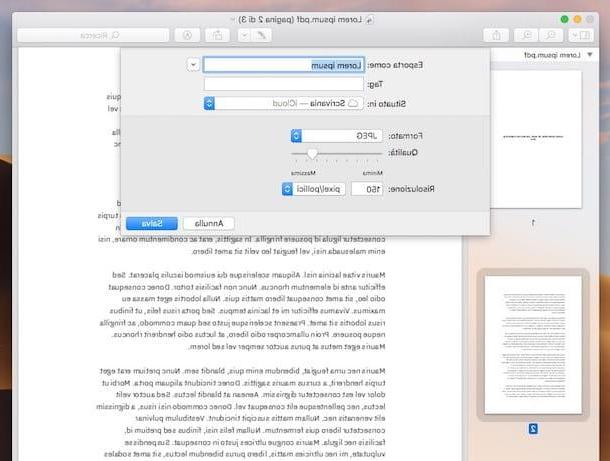
To use Preview for your purpose, open the document you want to work on and select the option Miniature from the menu Vista. At this point, right-click on the preview of the page to be transformed into a JPG file that appears in the left sidebar of the program window and select the item Export as give the menu to compare.
In the window that opens, select JPEG give menu to tendin Size and proceed with the export of the selected page indicating the name you want to assign them, the position in which to save the file by adjusting the settings related to quality and resolution and finally pressing the button Save. Repeat the operation with all the pages of the PDF you want to extrapolate and that's it.
Automator
If you need to convert a PDF file to JPG going to act on a document consisting of many pages, you can create a script in Automator. If you have never heard of it, Automator is an application included in macOS that allows you to automate various operations on files and folders based on scripts, in fact, or small applications created by the user.
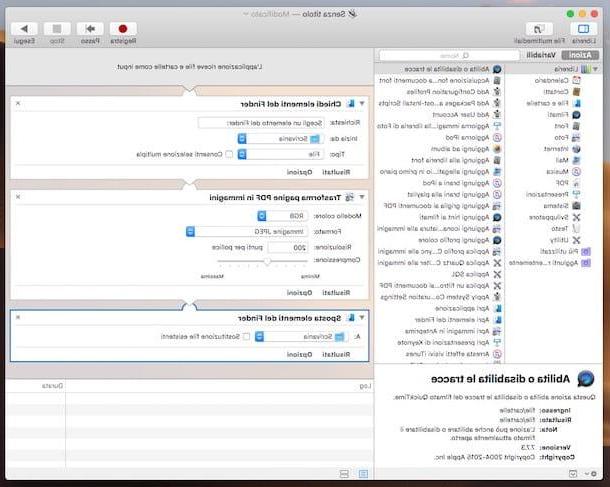
To create your PDF to JPG converter, first launch Automator by selecting it from the folder Other of Launchpad (has the icon of a robot). In the window that opens, click on the button New document and double-click the icon Application.
Now select the item library from the left sidebar and double-click first Ask for Finder items, Then Turn PDF pages into images and finally, su Move Finder Items, so that all three elements appear in the right part of the window.
At this point, select the voice Save from the menu Fillet located in the upper left part of the screen and save your "little program" verifying that in correspondence with the drop-down menu File format the option is selected Application (otherwise you provide), indicating the location for saving and pressing the button Save.
Now you just have to open the application you just created in Automator, select the PDF document to be transformed into JPG and within a few seconds you will find all the pages of the file saved on the macOS desktop in the form of JPEG photos. Great, right?
Programs to convert PDF to JPG on Mac
Let's move on to the third party programs thanks to which it is possible to transform PDF documents into JPG images: below you will find those that, in my opinion, represent the best in the category. Try them and you will see that you will not regret it!
PDF Toolkit +
The first of the third-party programs I invite you to consider is PDF Toolkit +: it is a light and compact application that allows you to edit or convert PDF documents in various ways. In short, a sort of Swiss army knife for electronic documents. It is not free, it costs € 2,29, but I can assure you that the practically negligible expense is worth it.
To use it, purchase and download it on your Mac by connecting to the relevant section of the Mac App Store Onlinepigging your pulse See in the Mac App Store and then clicking on the button with the price in the window of Mac App Store which opened on the desk. Finally, authorize the purchase by typing the Password of your Apple account (if required) or using the touch ID (if you have a Mac with Touch ID).
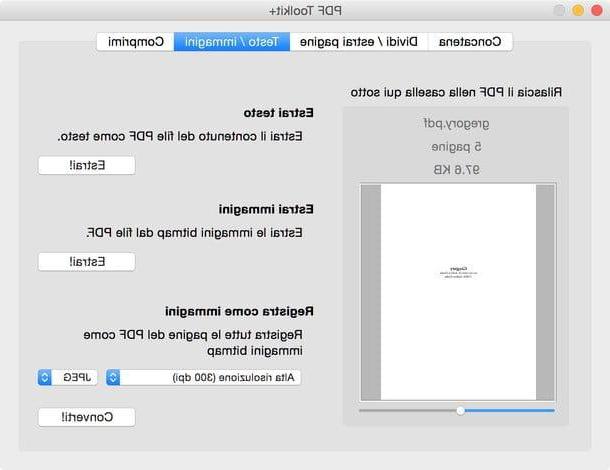
Next, launch the program by clicking on its icon (Quella with the hammer and the PDF document) added to Launchpad, go to the card Text / Images attached to the pop-up window on the screen, drag over the document to convert and set the option JPEG in the drop-down menu located at the bottom right.
Finally, make sure there is value High resolution (300 dpi) set in the drop-down menu located under the item Record as pictures and presses the button Converted to choose the folder in which to save the JPG images and finalize the operation.
Pixillion Image Converter
Another program you can consider is Pixillion Image Converter: it is a paid software that can be used free of charge for non-commercial use, which acts as a converter for images and PDFs and which also integrates various useful tools for editing and correcting the selected elements.
To download it to your computer, connect to its official website and click on the button Mac Download located in the upper center. When the download is complete, extract theZIP archive got it, open the package .dmg inside, click on the button Agree in the window that appears on the desktop and drag theprogram icon (Quella with the photo) in the folder Applications of macOS. Next, right click on it and select the item apri twice in a row, in order to open Pixillion Image Converter going around the limitations imposed by Apple on applications from non-certified developers.
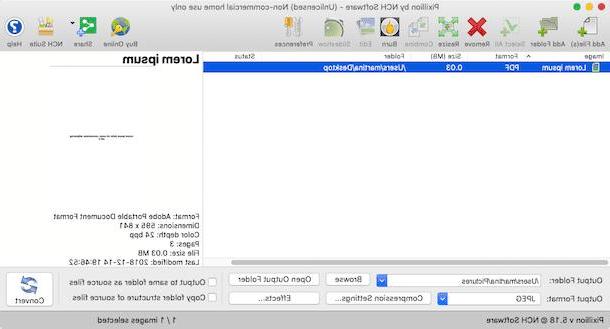
Now that you see the software window on your desktop, drag and drop the PDFs you want to turn into JPG over it. Alternatively, select the documents by hand by clicking on the button Add File (s) top left. If you want, you can also select an entire folder containing files to convert by pressing the button add Folder (always placed at the top, on the left).
At this point, select the option JPG give menu to tendin Output Format located at the bottom, click on the button Compression Settings adjacent to adjust the settings related to image compression and specify the output folder by pressing the button KATEGORIEN next to the item Output Folder (by default this is the folder Images).
If you want, make any adjustments to what will be the final image by pressing the button Effects. To conclude and, therefore, start the conversion, click on the button Convert which is on the right.
Online services to turn PDF to JPG on Mac
As I told you at the beginning of the article, you can transform your PDF files into JPG also by resorting to the use of solutions not included in macOS. Speaking of which, if you don't want to download new applications on your Mac, I suggest you consider using one of the online services specifically used for the purpose that I will report to you below.
ILovePDF

Another great online service that I recommend you appeal to is iLovePDF. Again, it is a web tool that offers various options dedicated to converting and editing PDFs. It does not require registration and safeguards the privacy of users by automatically removing the files uploaded to its servers. It's free and has an upload limit of 200MB.
To use it, connect to its page dedicated to converting PDF to JPG and drag the documents you want to act on in the browser window. Alternatively, click on the button Select PDF file and select them manually. You can also get files from dropbox or from Google Driveby clicking on the relevant buttons located on the right.
Then choose, by clicking on the appropriate buttons below, whether to convert entire pages to JPG (Pages to JPG) or whether to extract images from PDFs (Extract images) and click on the button Convert to JPG located at the bottom of the screen to start processing and downloading the images that will be downloaded in a ZIP archive. If you haven't changed your browser's default settings, the final ZIP file will be saved in the folder Download say macOS.
How to turn PDF to JPG on Mac


