How to turn an old PC into a server
If your PC has a few years on its shoulders, it's a good idea to check that the hardware is fast enough to guarantee access to even multiple users at the same time. In fact, in the event that the computer is really too old, there is a risk that it will not be able to carry out all the necessary operations, especially in the case of connection by two or more devices together. Therefore, I advise you to carefully check if the most delicate hardware components are adequately proportioned to the task that the server will have to perform.
Processor
The processor is the center of data processing and is very important within a server. In order to create a good home server, you need to make sure that the processor is at least dual-core, sufficient detail for the creation of a data server or an FTP server, or quad-core or higher, in case you intend to convert your computer to a media server or NAS server (as this may require “on the fly” decoding).
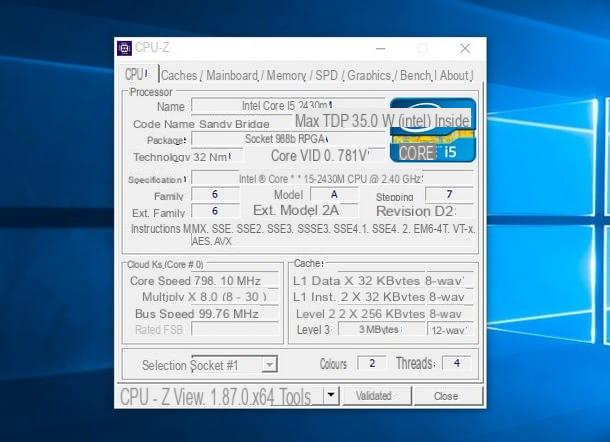
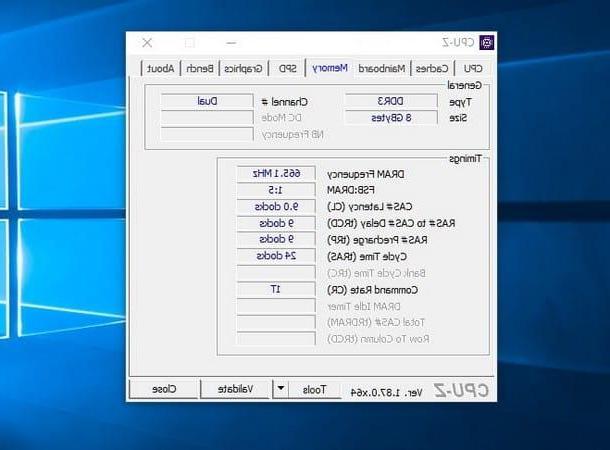
You can check the nature of the processor using a program like CPU-Z (or one of the programs to monitor the CPU temperature that I have proposed to you in this guide). Once on the CPU-Z download page, click on the button Setup · English placed in the box Download, repeat the operation with the button Download Now and, after starting the file obtained (eg. cpu-z_1.87-en), presses the button Yes, put the check mark next to the box I accept the agreement, award-winning Next four consecutive times and complete the setup by pressing the buttons install e Finish.
Once this is done, start the program and pay attention to the number of cores in the processor: to find it, go to the tab CPU I was close to you Colors e Threads, usually located in the lower right corner of the program.
RAM
Another important component for the functioning of the server is the RAM, which must be adequate for the number of autorun programs that will start with the server's operating system.
For the purposes of this guide, it is sufficient that the computer to be converted to a server has at least 4 GB of RAM memory. If the quantity is higher, the system will benefit greatly; on the contrary, pay attention to computers with only 2 GB of RAM (in this case, I recommend that you use it only for the creation of a data server, be it Web or FTP).
To find out the amount of RAM in your computer, restart CPU-Z, go to the tab Memory and take a look at the item Size. Alternatively, you can get the information you want by following the instructions I gave you in my guide on how to see your PC's RAM.
HDD
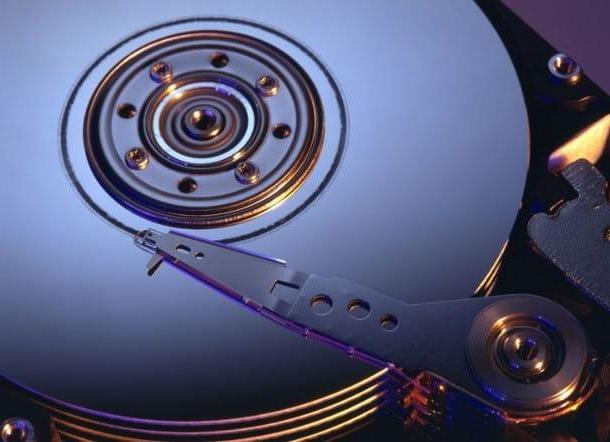
Il HDD it is very important on a server, even more so if it is destined to become an FTP server or a multimedia server, since in these cases it will act as a “warehouse” for the other network devices.
First check that the disk capacity is adequate for your purposes (for a media server or a data server, the disk must be large enough, so that it can comfortably hold everything you want), also check the possibility of expanding the memory storage, making sure there is free slots: if so, you will have the possibility to add, if necessary, additional disks to be used for archiving. Absolutely not recommended, in this case, SSDs (or solid state drives), which are unsuitable for data storage operations (the time duration of these devices decreases as the readings and writes performed increase).
Here are some great internal mechanical discs available on Amazon.
See offer on Amazon See offer on Amazon See offer on Amazon See offer on AmazonIf you need more advice on what disk to buy for your server, I suggest you take a look at my buying guide dedicated to internal disks: I'm sure you will find what is right for you.
Network card
Another component not to be underestimated is the network card, often integrated inside the motherboard: since the server will be connected to the router via Ethernet cable (so as to avoid problems due to the poor quality of the Wi-Fi), it must be fast enough to be able to withstand the requests made by the devices (even multiple accesses to the same file).
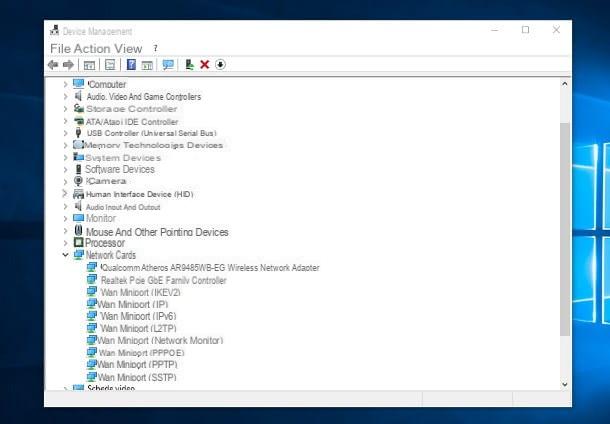
The best network card is the one that supports speeds Gigabit Ethernet, which allow to exchange data at the maximum speed of 1000 Megabits per second. To identify the network card on Windows, simply open the software Device management: to do this, press the key combination Win + R, type the command devmgmt.msc nell'apposito campo di testo e premi il tasto Submit.
Once the program has started, expand the entry Network cards and check for devices marked with the wording Gigabit Ethernet (o GbE). If not, you should think about adding a card of this type: below I propose some, available on Amazon.
See offer on Amazon See offer on AmazonClearly, the network card must be installed inside the computer in question: if you have never done this before, I invite you to contact a person a little more experienced or, better still, to read my guide. how to assemble a PC, in which I explained to you how to correctly identify the slots to use.
Operating System
Lastly, you need to decide which operating system to use on your server, as it will also affect the type of programs you can use.
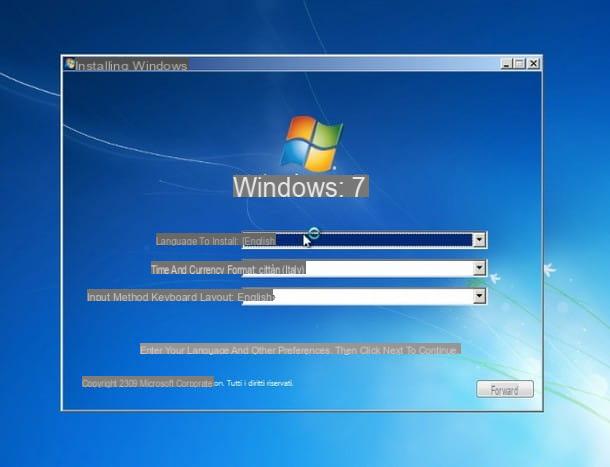
As I already mentioned to you at the beginning of this guide, I will base the remainder of the tutorial on the operating system Windows 7, since it is sufficiently light and therefore also suitable for older computers (although its support is about to end and is therefore destined to become vulnerable to security flaws); moreover, Windows 7 is compatible with the vast majority of existing programs (especially those of simple configuration) and has a rather intuitive user interface. Keep in mind that, if you do not already have one, you will need to purchase a Windows 7 license (in this tutorial I explained how to do it) and then proceed with the installation of the operating system on the server, following the instructions I have given you in this guide. .
A good free alternative to Microsoft operating systems is Linux, which provides various distributions dedicated to server use: however, I recommend that you use this solution only if you are already familiar with the world of the "penguin", as the configuration of some software may be quite complex.
Once the installation of the operating system is complete, connect the computer to the network through the Ethernet cable and, if you see fit, assign it a static local IP address (by doing so, the network IP will not change after the computer is turned off): I have explained to you the various methods to do this in my tutorial on how to assign static IP.
How to turn a PC into a media server
Now that you have all the information you need for turn a PC into a server, the time has come to make the appropriate configurations, depending on the type of server you intend to create. Within this section, in particular, I will deal with explaining how to create a multimedia server, using both the tools integrated in Windows 7 and some third-party programs.
Windows DLNA

The first technique you can take advantage of involves the use of DLNA, the protocol for sharing multimedia files over the network. It is already integrated in Windows 7 and must be activated manually to be able to exploit it properly.
To proceed, open the menu Home by clicking on the icon in the shape of pennant located at the bottom left, type the words Multimedia flows in the search field and click on the item Media streaming options that appears on the screen. In the window that opens, click the button Turn on media streaming, enter a name of your choice in the field next to the item Name the media library and click on your voice Choose default settings to edit the multimedia collections included in the catalog (i.e. multimedia files to be shared on the network).
When you're done, tap on the item Allow everyone and confirm the changes by pressing the up button OK; finally, open Windows Media Player and wait for all files to be indexed, so that they are available on other computers or devices on the network.
Universal Media Server
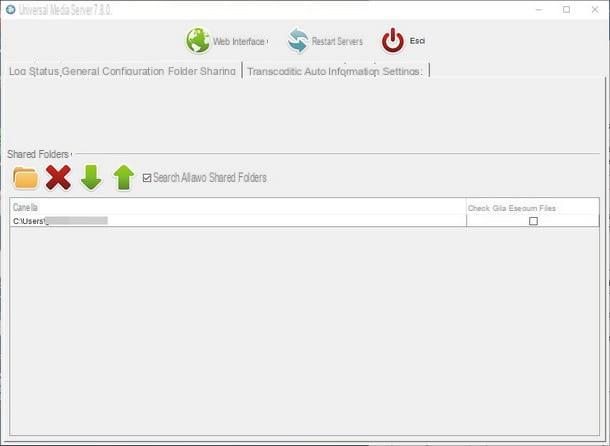
If you are not satisfied with the system built into Windows, you can quickly create a media server using a free program such as Universal Media Server. To get it, after connecting to the page reported above, press the button Windows placed at the top and wait for the setup file (eg. UMS-xxxexe) is downloaded to your computer.
Once the download is complete, start the file obtained and click on the buttons Yes, Next e install to quickly complete the setup; if, during the process, you were asked to install additional software necessary for the program to work, press the buttons Yes e install when required.
At the end of the installation, launch the program via the icon created on the desktop and, if necessary, press the button OK to automatically start downloading Java (which you can later install by simply pressing the buttons Install e Yes). At this point, click on the button Yes to confirm the start of the program together with Windows and select the item Wired (Gigabit), so as to optimize the performance of the media server; subsequently, click several times on Yes to confirm the default program settings.
Once in its main screen, click on the tab Sharing folders and then on the icon in the shape of folder to add the multimedia folders you want to share: after a few moments, these will be immediately available for the other devices on the network, via DLNA, without the need for additional configuration.
Plex
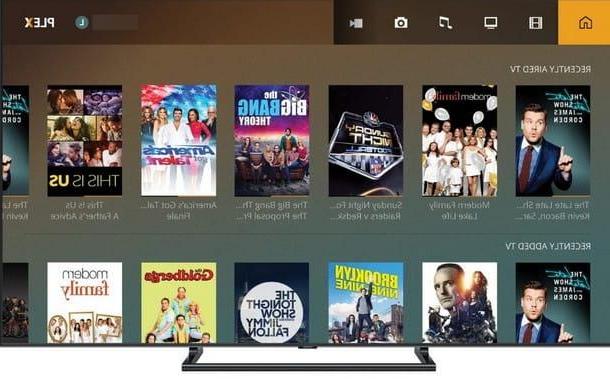
Another program you can use to create a media server is Plex, a valid multimedia server that is very easy to use. Plex provides local network content via its proprietary protocol (compatible with other Plex apps, installed on PC, console or Smart TV), or via DLNA (for devices not compatible with the proprietary protocol).
To install it on the computer intended for use as a media server, connected to the official page of the program, make sure that the operating system is correctly specified and press the button Download to download the installation file.
Once you have the file, launch it without hesitation and complete the setup (with the consequent addition of Plex to the programs in auto-start with the system), following the instructions on the screen. If you want to learn more about Plex and how to configure it, I invite you to read the specific guide I made on the subject.
How to turn a PC into a NAS server
A NAS (aka Network Attached Storage) is a type of computer that can be connected to the local network to share various types of files, using a variety of protocols available on any type of device.
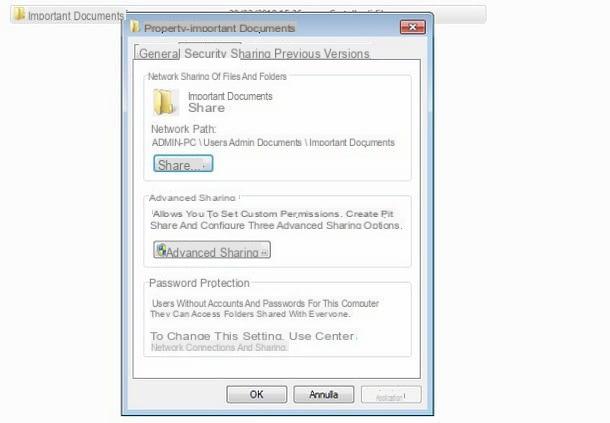
The heart of a NAS is therefore the sharing folders, which must also be accessible from other devices, in the form of network folders. In order to transform a PC into a NAS server, therefore, you must first of all share the folders of your interest within the network: to proceed, right-click on the folder you want to share, then click on the Property attached to the menu that opens. In the new window that opens, click on the tab sharing e pulsing sul pulsating Share placed inside.
If everything went well, a new screen should open in which you can specify the access permissions for the folder: as a rule, the NAS provides access for anyone connected to the network. So, to replicate this behavior, type the word Everyone in the text field located at the top (respecting upper and lower case), then click on the button Add. As soon as you see the new user added to the share, use the drop-down menu located near him (under the column Authorization level) to choose whether to allow access to files in single letter or with full authorization (thus giving the possibility to view, modify and add new files to the folder).
When you are done, click on the buttons Share e Operation complete to finish editing. To check if the folder is visible, start a file manager with network support (that's fine File Explorer Windows) from any other device connected to the same router, access the section relating to Network and check that your server name appears among the available devices.
If this does not happen, or if you are asked to provide a username or password for access, go back to the server, open the menu again Home and type the entry in it network and sharing center, then click on the first result returned. Once in the new window, click on the item Modify impostazioni di condivisione Avanzate, expand the profile Domestic or work and check that next to the entries Enable network discovery, Enable file and printer sharing e Enable sharing to allow all users with access to the network to read and write public folder files there is a check mark, otherwise set it yourself; to remove the password protection instead, put the check mark next to the item Disable password protected sharing. When it is finite, click on the button Save Changes and try to access the shared files again, as I showed you earlier.
If you want to learn more about sharing folders on the network, I invite you to read my guides on how to share a folder on the network and how to create a shared folder, where you will find other useful tips for sharing files and folders.
How to turn a PC into a web server

How do you say? Are you thinking of creating a personal website and, at least initially, would you like to carry out all the necessary tests directly on your computer? If this is your purpose, you might consider turning your old PC into a web server, properly configured for the purpose.
In this regard, I recommend that you rely on the software XAMPP: this small "suite" of programs, available for operating systems Windows e Linux (and, in compatibility mode, also for MacOS), allows you to quickly configure a Web server, complete with PHP and Perl environments, as well as a mySQL database, without having to "fiddle" with the long (and often complex) configurations related to each component.
To use it, connected to the main page of the program, click on the button that best suits your operating system (in this case, XAMPP for Windows) and wait for the installer to completely download to your computer. Next, launch the obtained file (eg. xampp-win32-xx-Y-installer.exe), presses the buttons Yes e Next three times, remove the check mark from the box for Bitnami for XAMPP, presses the button twice again Next and wait for the setup to be completed; if required, you may have to press the button Allow access to authorize the program to bypass the Windows firewall.
At this point, click on flag of the United States and then on the button Save to set the program in English, press the XAMPP icon located near the Windows clock (shaped White X on orange background), click on your button Home corresponding to Apache (the real web server) and that's it: your web server is finally up! To access it, enter the address localhost from a browser active on the server, or http: // LocalIPAddressDelServer: 80 (eg. http://192.168.1.40:80) from any other device connected to the network.
If you intend to access your web server also from the outside, you must first obtain the router's public IP or set up a dynamic DNS (I gave you more information on this in the final stages of the next section), and then open port 80 of the router on the local IP address of the server; once the configuration is complete, you can access your Web space by typing the address http: // PublicIPAddress (e.g. http://12.34.56.78) or http: // Dynamic DNS (e.g. http: // website-safe .dyndns.org).
You can start building your website right away by uploading the necessary files to the Apache "root" folder, which by default is C: xampphtdocs (you can quickly access it by clicking on the button Explore located in the main screen of XAMPP).
If you need to use mySQL, the integrated database manager (necessary if the site you intend to create needs to store persistent data, if you need to install WordPress or other CMS that require the presence of a database), click on the button Home located in its correspondence, again through the main XAMPP screen.
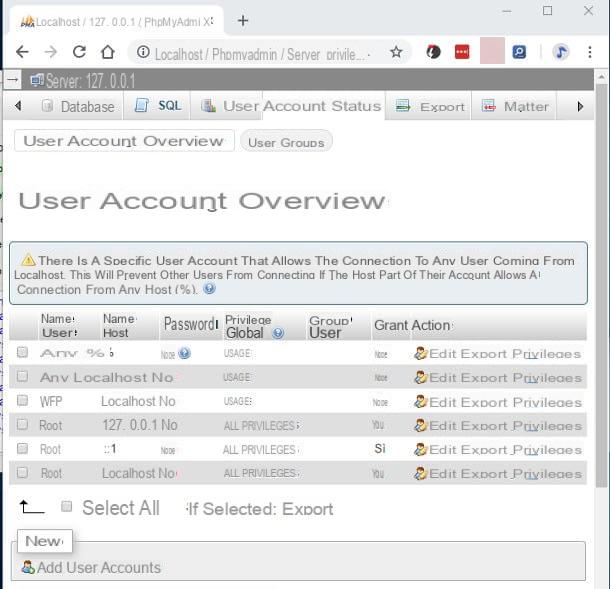
Keep in mind that, by default, mySQL does not contain tables, uses the MariaDB engine and requires access via the root user only, not password protected. To change the settings, you can manually act on the file my.ini, placed in the path C: xamppmysqlbin, or act through the management system phpMyAdmin, which you can invoke by clicking on the button admin corresponding to the mySQL box, in the main XAMPP screen, or by visiting the page localhost / phpmyadmin.
How to turn a PC into an FTP server
Do you want to access your personal files even when you are away from home? The best way to do this is to equip yourself with a FTP server which, after proper configuration, is able to make the selected folders available for remote access via the Internet.
For this purpose, I recommend that you turn to FileZilla Server, a free software designed specifically for the purpose of creating an FTP server. To use it, connect to its official website and click on the button Download FileZilla Server to immediately download the setup file. Once the operation is complete, start the file thus obtained (eg. FileZilla_Server-xxxx.exe) and click on the buttons Yes, I Agree, Next for three times, install e Close to complete the setup.
At the end of the installation, the program should start immediately and propose a window with the request for access to the server: enter only the administration password (different from the access one) in the field Password, put the check mark next to the item Always connect to this server and finally click on the button Connect.
After this procedure, click on the menu Edit > Settings placed at the top, then brought into the section FTP over TLS settings. Now, to allow only the exchange of files in a secure way, put the check mark next to the item Enable FTP over TLS support (FTPS) and Disallow plain unecrypted FTP, then generate your new certificate by clicking Generate new certificate ....
Then, fill out the proposed form with the required information, put the check mark next to the item 2048 bitclick on your button Browse ... to indicate a location in which to save the certificate and, when you're done, press the buttons Save e Generate certificate. Once the certificate has been generated and returned to the settings screen, click on the item Miscellaneous and apponi il segno di spunta accanto alla voce Start minimized; finally, move to the section Passive mode settings, activate the voice Use custom port range and enter a range of ports to use for passive mode (for example 65000-65100). When you are done, press the button OK to confirm everything.
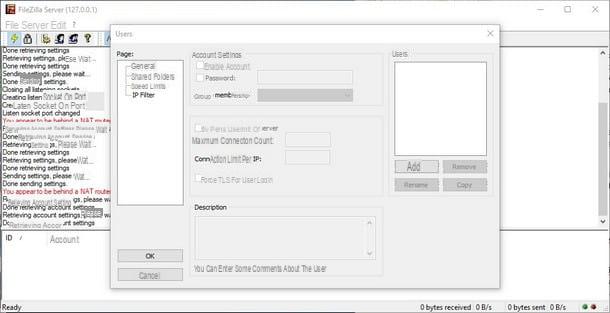
Now that the server is set up, you will need to create an FTP user, which you can use to decide which folders to share and which username and password to use. To do this, go to the menu Edit> Users and, in the new window that appears, click on the button Add: therefore indicates the name user for the FTP account to be created (other than that of the PC or Windows), then click the button OK.
This will unlock the other configuration items: put the check mark next to the item Password and choose a new access password (different from the administration password added a little while ago) and put the check mark next to the item Force TLS for user login.
To add folders to share via FTP, click on the item Shared folders located at the top left, then on the button Add, and use the proposed window to add new folders to the share, also specifying the type of permissions (Read for read only, Write for reading and writing or, if desired, specific permissions for adding or deleting files and sub-folders). Once setup is complete, just click OK per rendere effettive I modified it.
From now on, the FTP server will be accessible by typing, from any browser connected to the same network as the server, the IP address assigned by the modem (I suggest you set a static local IP following the instructions I gave you in this guide) followed by the string:21 (With art. PM192.168.1.192:21). To access the files from the outside, however, you must first take note of the "public" IP address of your Internet connection (which you can find from any device connected to the network, following the instructions provided in this tutorial), and then open in router port 21 and the range of ports 65000-65100, refer to the IP address of the server (here I explained how to do it).
For convenience, you may want to set up a DNS dynamic, so you can reach your FTP server by entering a custom literal address, instead of worrying about recovering the dynamic public IP every time: I explained how to do it in the appropriate section of my VPN guide.
Once these operations have been completed, you can also access the files from the outside by typing in the browser the public IP address (or dynamic DNS) of your router, following the string : 21 (With art. PM123.45.67.89:21 or -ftp.dyndns.org:21).
For convenience, you can insert FileZilla among the automatic start programs, so as to start your FTP server directly together with Windows: if you don't know how to do it, follow the steps described in my guide on how to open programs when the operating system starts.
If, on the other hand, you want to learn more about FileZilla and the other programs for managing FTP connections, I suggest you read my guides dedicated to using FileZilla and programs for FTP.
How to turn a PC into a server